Warehouse racking uprights transfer heavy loads into the concrete floor through baseplates and anchors. A small installation error can create movement, uneven loading, or progressive damage. This guide explains How to anchor warehouse racking uprights to concrete floors safely, using practical checks and proven installation principles.
Safety begins before drilling. Confirm the rack design, upright loads, anchor specifications, and concrete condition. Manufacturer instructions and a qualified structural professional should guide every decision. A clean, dry slab is not automatically a strong slab. Cracks, joints, thin sections, or hidden services may change the installation method.
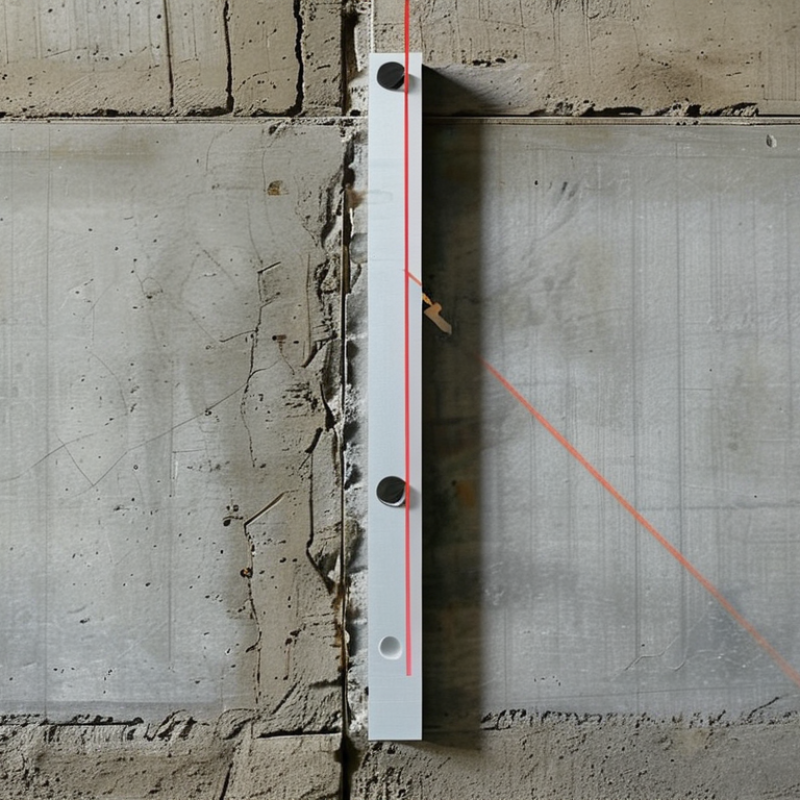
Measure the aisle layout carefully. Mark each baseplate hole with a precise chalk line or laser. Keep the drill perpendicular to the floor. Remove dust from every hole with the specified cleaning method. Dust left inside can reduce anchor performance. It is easy to overlook.
Use only anchors approved for the rack system, concrete strength, and expected loads. Follow the required embedment depth and edge distances. Do not substitute fasteners because they appear similar. Tighten each anchor with a calibrated torque wrench, not guesswork. Record the torque values and installation date.
After anchoring, inspect every baseplate for gaps, loose washers, damaged threads, or cracked concrete. Check that uprights remain plumb and that bracing connects correctly. A neat installation can still be wrong. Recheck anchors after loading, especially when forklifts operate nearby. Experienced installers know that real warehouses are imperfect. Floors settle, layouts change, and damage occurs. Regular inspections keep a technically sound installation reliable in daily use.
How to Anchor Warehouse Racking Uprights to Concrete Safely
Concrete and safety requirements should guide every warehouse racking anchor decision. Start by confirming the slab’s thickness, compressive strength, and condition. Cracks, weak patches, and concealed joints can reduce anchor performance. A qualified engineer should verify anchor type, diameter, embedment depth, spacing, and edge distance. These values depend on rack loads, seismic conditions, and local building requirements.
Before drilling, scan for reinforcement, conduits, and embedded services. Clean each hole carefully, because dust can weaken the connection. Install anchors at the specified depth, then apply the required torque with a calibrated tool. Do not guess. An anchor that feels tight may still be incorrectly installed. Uprights should remain plumb, with base plates fully supported by sound concrete. Damaged concrete needs repair before installation, not after loading.
Tips: Mark every drilling point clearly. Keep a record of anchor sizes, torque readings, and inspections. Check for movement after the first loading cycle. Small details matter. One practical lesson is that installation drawings rarely show every site problem. Crews may discover uneven slabs, hidden cracks, or unsuitable drilling locations. Pause and reassess instead of forcing the original plan. Requirements can vary by jurisdiction, so the final installation should be reviewed against applicable standards and approved by a competent professional.
How to Anchor Warehouse Racking Uprights to Concrete Safely
Safe anchoring begins with the right tools. Use a rotary hammer, approved masonry bit, depth gauge, wire brush, vacuum, calibrated torque wrench, and protective equipment. Clean holes matter. Dust can reduce bond strength, especially with adhesive anchors. Check the concrete slab for cracks, hollow areas, reinforcement, and hidden services before drilling. OSHA 1910.176(b) requires stored materials to remain stable and secure, while the RMI Specification for the Design, Testing and Utilization of Industrial Steel Storage Racks supports engineered anchorage decisions.
Anchor selection depends on the rack design and concrete condition. Expansion anchors suit many standard installations, but they require correct hole diameter, embedment, edge distance, and tightening torque. Adhesive anchors can work near edges or in cracked concrete, when an approved engineering design allows them. Choose galvanized or stainless components where moisture or chemicals may cause corrosion. Verify pullout and shear capacities against the rack reactions, not only the anchor’s advertised strength. FEMA 460 identifies pallet-rack anchorage as a key seismic design concern. It also stresses proper load paths.
Do not guess the embedment depth. Measure it. Install each anchor through a sound baseplate, then torque it with a calibrated wrench. Loose washers, tilted plates, and over-torqued anchors are common field errors. The U.S. Bureau of Labor Statistics recorded 5,283 workplace fatalities in 2023, showing why small installation shortcuts deserve serious review. I still recheck hole cleaning and torque records; rushed work can look acceptable while remaining unsafe.
| Category | Item or Anchor Type | Typical Application | Typical Technical Range | Key Installation Requirements | Advantages and Limitations | Inspection Check |
|---|---|---|---|---|---|---|
| Concrete | Existing concrete slab | Base material for rack-upright anchorage. | Confirm compressive strength, slab thickness, reinforcement layout, joints, cracks, and deterioration before drilling. | Do not drill into post-tensioning tendons, embedded utilities, or reinforcing steel without an approved engineering procedure. | Sound, adequately thick concrete provides reliable capacity. Thin, damaged, hollow, or severely cracked concrete may require a different design. | Verify condition and thickness using project drawings, records, or approved scanning methods. |
| Anchor Selection | Torque-controlled wedge expansion anchor | Common choice for steel rack base plates subjected to shear and tension in suitable concrete. | Common diameters: approximately 3/8 to 5/8 in (10 to 16 mm). Effective embedment is often about 2.5 to 4.5 in (65 to 115 mm), subject to the anchor evaluation. | Drill the specified hole diameter and depth, clean the hole, install through the base plate, and tighten with a calibrated torque wrench to the specified torque. | High capacity and immediate loading after correct installation. Performance decreases near edges, in thin slabs, or in concrete that is cracked unless the anchor is specifically qualified. | Check anchor diameter, embedment, washer contact, thread condition, and installation torque. |
| Anchor Selection | Sleeve expansion anchor | Light- to moderate-duty anchorage where loads and slab conditions permit. | Common diameters: approximately 1/4 to 5/8 in (6 to 16 mm). Embedment commonly ranges from about 1.5 to 3.5 in (40 to 90 mm), depending on the evaluated product. | Use the specified drill bit, hole depth, and tightening method. The sleeve must be fully engaged in sound concrete. | Simple installation and useful for some moderate loads. Usually lower capacity than a comparable heavy-duty wedge anchor and more sensitive to edge distance. | Confirm the sleeve is not damaged, the nut is fully engaged, and the specified torque is achieved. |
| Anchor Selection | Concrete screw anchor | Applications requiring fast installation, removability, or reduced expansion pressure near edges. | Common diameters: approximately 1/4 to 3/4 in (6 to 19 mm). Effective embedment is commonly about 1.75 to 3.25 in (45 to 85 mm), subject to the evaluated product. | Drill the correct pilot-hole diameter and depth, remove dust, and install with the specified driver or torque control. Do not overdrive the screw. | Fast and removable, with relatively low expansion stress. Capacity can be lower than heavy-duty expansion or adhesive systems and depends strongly on hole quality. | Check thread engagement, head seating, damaged threads, and any evidence of over-torquing or spinning. |
| Anchor Selection | Adhesive anchor with threaded rod | Higher-capacity or deeper anchorage where the concrete condition, edge distance, and design require an adhesive system. | Threaded rods commonly range from approximately 3/8 to 3/4 in (10 to 19 mm). Embedment may be deeper than mechanical anchors and must be calculated for the specific system. | Brush and blow the hole using the specified cleaning sequence, inject adhesive from the bottom, insert the rod with the required rotation, and observe the full curing time. | Can provide high capacity and reduced expansion stress. Installation is sensitive to hole cleaning, temperature, moisture, adhesive shelf life, and cure time. | Record batch information, ambient and concrete temperature, hole cleaning, rod position, and cure time before loading. |
| Tools | Rotary hammer and approved drill bit | Drilling holes for mechanical or adhesive anchors. | Bit diameter and drilling mode must match the anchor instructions. Hole depth should include the specified extra drilling allowance where required. | Keep the drill perpendicular to the concrete and avoid enlarging or ovalizing the hole. Use a depth stop or marked bit. | Proper drilling improves anchor engagement. A worn or incorrectly sized bit can reduce capacity and prevent correct installation. | Inspect bit wear, diameter, hole depth, perpendicularity, and damage to the concrete surface. |
| Tools | Hole-cleaning equipment | Removal of dust and drilling debris before anchor installation. | Use a correctly sized nylon brush and oil-free compressed air or an approved vacuum system. | For adhesive anchors, follow the specified blow-brush-blow or equivalent cleaning sequence. Do not rely on casual surface wiping. | Correct cleaning is essential, especially for adhesive anchors. Dust left in the hole can significantly reduce bond performance. | Verify brush fit, air cleanliness, cleaning cycles, and absence of loose dust or standing water when not permitted. |
| Tools | Calibrated torque wrench | Controlled tightening of torque-sensitive mechanical anchors and base-plate nuts. | Torque range must cover the anchor specification. Calibration should be current according to the site quality program. | Tighten smoothly without impact tools unless specifically permitted. Keep the wrench aligned with the fastener. | Provides consistent preload and helps identify under-tightened or over-tightened anchors. | Record the required torque, actual verification results, tool identification, and calibration status. |
| Materials | Steel base plate, washer, and nut | Transfers rack-upright forces into the anchor group and concrete. | Plate thickness, hole size, washer dimensions, and steel grade must match the approved rack design. | Set the base plate flat and fully supported. Do not use loose washers, stacked scrap steel, or oversized holes without engineering approval. | A properly fitted base plate distributes load. Bent plates, poor bearing, or excessive hole clearance can reduce stiffness and load transfer. | Check plate flatness, weld condition, hole alignment, washer seating, nut engagement, and corrosion protection. |
| Layout | Edge distance and anchor spacing | Controls concrete breakout, splitting, and interaction between adjacent anchors. | Minimum values are anchor-specific. Use the evaluated anchor data and design standard rather than a universal rule of thumb. | Measure from the anchor centerline to slab edges, joints, cracks, and adjacent anchors. Relocate the upright or obtain an engineered detail when clearances are inadequate. | Greater spacing and edge distance generally improve capacity. Existing joints and cracks can govern the design. | Document actual dimensions and compare them with the approved layout before drilling. |
| Installation | Base-plate leveling and shimming | Provides full bearing and maintains rack alignment. | Use only approved steel shims or leveling components sized for the design load. | Keep shims fully under the plate, avoid unsupported corners, and grout or otherwise stabilize the base when required by the design. | Correct bearing reduces bolt bending and local concrete stress. Improvised materials may crush, shift, or create gaps. | Check plumbness, bearing contact, shim position, grout condition, and final anchor tightness. |
| Safety | Personal protective equipment and work controls | Protects installers during drilling, cleaning, and chemical-anchor work. | Safety glasses, hearing protection, gloves, safety footwear, dust control, and respiratory protection where required by the risk assessment. | Control silica dust, isolate the work area, secure the rack, protect nearby workers, and follow the adhesive safety data sheet. | Reduces exposure to dust, noise, flying particles, falling objects, and uncured chemicals. | Confirm permits, exclusion zones, dust controls, PPE, ventilation, and housekeeping before work begins. |
| Verification | Final inspection and documentation | Confirms that the installed anchorage matches the approved design and installation instructions. | Record anchor type, diameter, quantity, location, embedment, torque or curing information, and any deviations. | Do not load or commission the rack until required inspections, proof testing, or engineering approvals are complete. | Creates traceable evidence of installation quality and identifies nonconforming anchors before the rack is placed in service. | Any failed, loose, misplaced, damaged, or under-embedded anchor requires evaluation and an approved corrective action. |
| Design Note | Anchor capacity and final selection | Determines whether the anchor group can resist rack overturning, shear, tension, and combined actions. | Capacity depends on concrete strength, cracked or uncracked condition, embedment, edge distance, spacing, load direction, installation quality, and applicable design code. | Use the rack supplier's approved design, a qualified structural engineer, and the anchor's current evaluation data for final selection. | The dimensional ranges shown above are typical field ranges, not universal design values or permission to substitute anchors. | Never select an anchor solely by diameter. Verify the complete engineered load path and installation requirements. |
Before anchoring warehouse racking uprights, inspect the concrete like a working surface, not a blank canvas. Remove dust, oil, laitance, loose coatings, and standing water around every baseplate. ACI 117 guidance commonly limits slab elevation variation to about 1/4 inch over 10 feet, but rack aisles may require tighter control. Check the actual floor with a laser level. Do not trust visual judgment. Small height differences can create uneven loads, especially beneath shims.
Mark each upright from a verified gridline, then measure bay spacing in both directions. Leave operating clearance for forklifts, sprinkler systems, doors, and pedestrian routes. OSHA reports that forklifts are linked with roughly 85 workplace fatalities and 34,900 serious injuries annually in the United States. Poor positioning can increase collision exposure. Keep baseplates fully supported, and use only engineered shims approved for the rack and anchor system. Improvised steel scraps may tilt the frame or damage the slab.
Drill after confirming the layout, not before. Scan for embedded reinforcement, conduits, and post-tensioning where applicable. Clean each hole thoroughly; drilling dust can reduce anchor performance. Anchor diameter, embedment, edge distance, and concrete strength must follow the project engineer’s design and the anchor evaluation data. A common mistake is measuring from a crooked wall. Recheck every row against the original control line. It feels slower. It is cheaper than correcting a misaligned rack after loading. Document floor readings, anchor locations, concrete conditions, and any unresolved deviation before installation continues.
Safe anchoring starts with accurate layout. Mark each hole through the upright baseplate. Check the slab thickness, concrete condition, and anchor spacing before drilling. A qualified engineer should confirm the anchor type, diameter, embedment depth, and required torque. Do not guess from the bolt’s appearance. Concrete may contain reinforcement, conduits, or hidden services. Scan the drilling area when appropriate, and stop if the concrete sounds hollow or breaks unexpectedly.
Use a sharp bit suited to the specified anchor. Keep the drill perpendicular to the slab. A tilted hole can reduce contact and weaken the connection. Drill slightly beyond the required depth, then remove dust with a vacuum and hole brush. Dust left inside the hole can prevent proper expansion. It is a small detail. It matters. Install the anchor through the baseplate, keeping the upright aligned and fully seated. Use approved shims only when the design permits them.
Tighten the nut with a calibrated torque wrench. Follow the specified sequence and torque value, rather than relying on feel. Impact tools can over-tighten or damage threads. Watch the baseplate while tightening. It should remain flat, without rocking or lifting. Record the anchor size, installation date, and torque checks. In inspections, loose nuts often trace back to rushed cleaning or poor alignment. I still recheck the first installed upright before continuing. That extra pause can reveal a layout mistake early. Reinspect anchors after the rack is loaded and after any major impact.
How to Anchor Warehouse Racking Uprights to Concrete Safely
Inspecting the Installation and Maintaining Structural Safety
A secure upright begins with sound concrete, correct embedment, and accurately tightened anchors. Before loading, inspect every baseplate for full contact, visible gaps, cracked concrete, and misplaced holes. Small cracks matter. Check upright plumbness with a calibrated level, not by eye. Verify anchor type, diameter, embedment depth, and tightening torque against the approved installation documents. Never guess torque values. Record them with the installer’s name and inspection date.
The United States Bureau of Labor Statistics reported 1,053 fatal injuries in transportation and material-moving occupations during 2023. Racking damage is not always dramatic. A bent footplate, loosened nut, or forklift impact can quietly reduce capacity. OSHA 1910.176(b) requires stored materials to remain secure against sliding or collapse. After any impact, isolate the affected bay, unload it, and arrange a competent inspection. Informal repairs can hide deeper concrete failure.
EN 15635 recommends a documented expert inspection at least every 12 months, with more frequent checks in busy warehouses. Weekly visual checks should examine anchors, bracing, beams, guards, and floor cracking. HSE guidance also supports immediate reporting of damage. A checklist helps, but it can miss changing conditions. Moisture, repeated vibration, and expanding cracks deserve closer engineering review. Keep photographs, torque records, repair actions, and load-limit signs together. Maintenance becomes weaker when records are incomplete.
Inspection checkpoints for verifying installation quality and maintaining structural safety.
A safe installation requires more than tightening the anchor. Inspect the concrete condition, anchor type, hole preparation, embedment, tightening, upright alignment, and damage after installation. Follow the rack designer’s specifications and the anchor manufacturer’s published requirements for exact dimensions and torque values.
: Use a rotary hammer, approved masonry bit, depth gauge, wire brush, vacuum, and calibrated torque wrench. Wear suitable eye, hearing, hand, and respiratory protection. Clean holes matter.
Check for cracks, hollow areas, reinforcement, moisture, and hidden services. Avoid damaged concrete unless an engineer approves a suitable repair or design. Do not guess.
Match the anchor to the rack design, concrete condition, edge distance, and required embedment. Expansion anchors suit many standard installations. Adhesive anchors may help near edges or in cracked concrete, with approved engineering guidance.
Dust can reduce adhesive bond strength and interfere with anchor performance. Measure the hole depth with a gauge. Brush and vacuum it thoroughly before installation.
Place each anchor through a sound, fully supported baseplate. Keep the plate flat and washers seated correctly. Tighten anchors using the specified torque and a calibrated wrench.
Check baseplate contact, visible gaps, concrete cracks, anchor size, embedment, and torque records. Confirm the upright is plumb with a calibrated level. Visual judgment alone can miss small errors.
Isolate the affected bay immediately and unload it safely. Arrange a competent inspection before reuse. Do not hide damage with informal repairs.
Perform weekly visual checks on anchors, bracing, beams, guards, and floor cracking. Arrange a documented expert inspection at least every 12 months. Inspect more often in busy or vibrating areas.
Keep anchor details, measured embedment, torque values, photographs, repair actions, and load limits together. Include the installer’s name and inspection date. Incomplete records weaken future decisions.
Common errors include tilted plates, loose washers, wrong hole sizes, shallow embedment, and excessive torque. Rushed work may look acceptable. I still recheck cleaning and torque records.
How to anchor warehouse racking uprights to concrete floors safely requires careful planning, suitable materials, and strict attention to structural safety. Begin by confirming that the concrete floor is strong, sound, and appropriate for the intended rack loads. Select anchors based on the floor condition, upright design, load requirements, and installation environment. Gather the correct measuring, drilling, cleaning, leveling, and tightening tools before positioning the uprights according to the approved layout. Keep aisles clear, maintain required spacing, and check that each frame is plumb and properly aligned.
After marking the anchor locations, drill holes to the specified diameter and depth while avoiding damaged concrete, joints, embedded services, and reinforcement where possible. Remove dust and debris, install the anchors correctly, and tighten them gradually to the required torque without over-tightening. Confirm that baseplates are fully supported and that the racking remains stable. Finally, inspect every connection, upright, brace, and protective component before loading the system. Record the installation details and schedule regular checks for loosened anchors, floor damage, corrosion, impact damage, or changes in rack condition.

Lush Rack